Exhaust: Gut Precats
Wrttten by:John "jstodda79"
Ok so I took on the delightful task of gutting my precats.. as usual, the front precat came right out and I had it clean as a whistle in about 10 minutes... The rear.. was another story.. so here is my humble walkthrough with pics.. Manly for the noobs that have heard rumors but dont think they can do it.. Its a FREE simple mod.. and it works.. here ya go!!!
Before we start, remember a few things, 1. keep your bolts you dont want to have to go get more after youre all dirty, 2. keep your gaskets, again, you dont want to have to order some, or make some, just keep the ones you have, 3. treat all the bolts with PB blaster the day before. Spray it on, tap the bolt, spray it on again.. this will make it alot easier for ya..Hopefully hehe.. ok so here we go.
You will need the following:
- Simple drill (at least 12V with a 1 foot long 1 inch wood boring drill bit -- any ACE hardware has it)
- A good hammer (I used a 2.5 pound mini sledge)
- A GOOD 1 inch wood chisel (Again, I used a stanley, about 9 inches total length and sharp as hell)
- A 3/8 or 1/2 wrachet with 19mm long socket
- A long extension (10 inch or so)
- 12mm socket and whatever size you have on your CAT/Testpipe
- A GOOD jack
- jack stands (the higher the better)
- (HELPFUL - 17 or longer breaker bar, PB Blaster, GOOD GOGGLES THAT SEAL AROUND THE EYE, A broom, Tarp, Detox suit, whatever you can find.. Its messy).
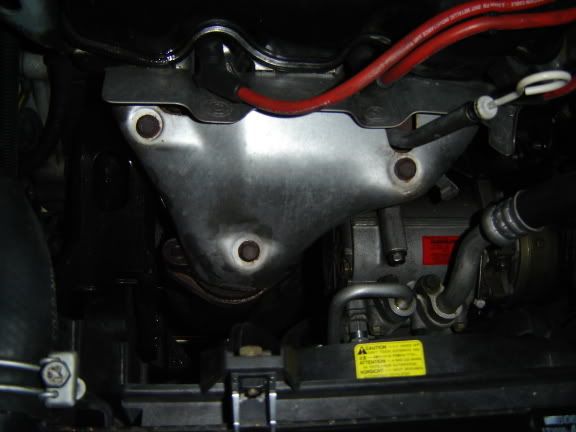
Ok so here is how I do it, everyone is different. First you may need to remove the heat shield on the front headers to get to the top precat bolts, may not, but I had one strip... just remove the three bolts and set it off to the side..
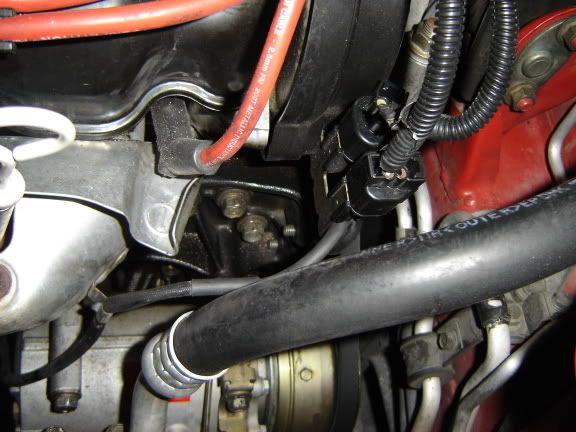
Now while your up there remove the O2 sensor that is attached by the timing belt cover to the lower right of the last spark plug, just press on the tab and pull, it should come right off, if you dont know which one, just follow the O2 wire from the precat up to the correct plug. In this case its the bottom of the two.
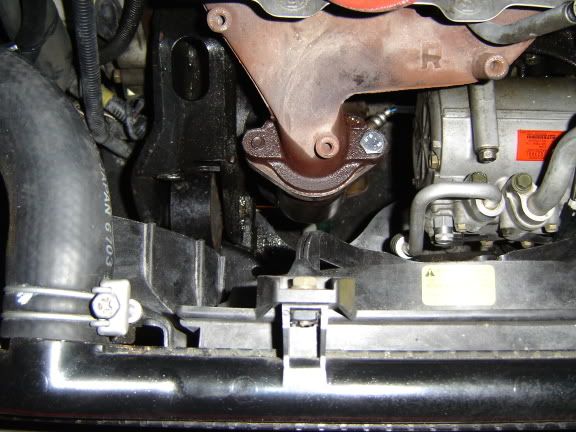
Now you can loosen the two bolts attaching the precat from the header. Either do so from the top of the engine or from underneath, either way it should be a 19mm bolt. Youll need that long extension if your doing it from underneath. This is top view (see the stripped screw hehe) You can see the O2 sensor and wire peeking out from the right side of the precat.
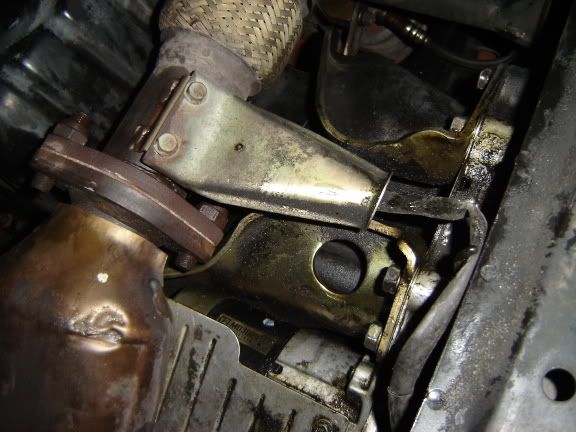
Next we need to get underneath and loosen the back precat.. shown is where the Front precat attaches to the DP, dont bother with these bolts yet. Down the Downpipe we see the same setup: 2 screws 19mm.. Youll have to use the extension to get past the bar in the way. Take these all the way off, the Front precat will keep the whole down pipe suspended.
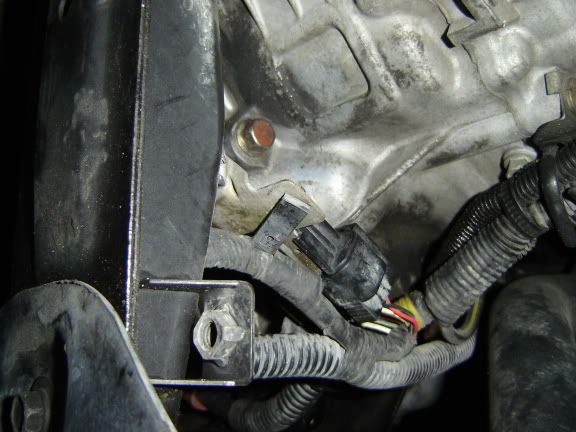
Also, make sure to loosen the O2 sensor thats attached to the bottom precat. I have here showing where the O2 Sensor wire comes from and where it attaches (close to the Transmission).
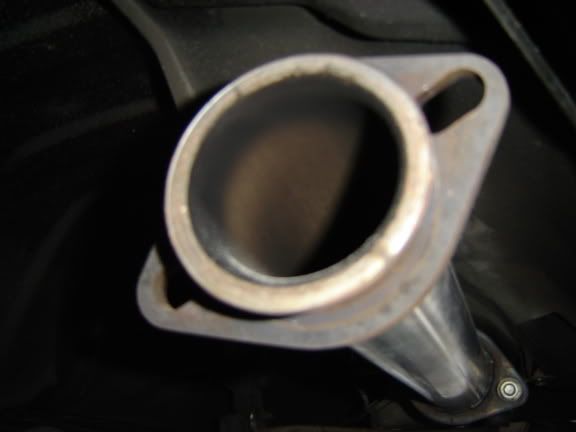
Ok, now that both precats are loosed from the headers (remember were keeping the front precat attached but loose, the rear screws are totally removed. Now we will separate the whole Downpipe (DP) from the Catalytic coverter (CAT) or the testpipe. Most of these bolts are on there pretty good, use the PB Blaster, tap the screw, more PB, more tapping. Actually screw the bolt tighter, just a hare, it will loosen the bolt and allow us to take it right off. You can take these right off, the DP will be suspended from a 12mm bolt attached to a rubber hanger (exhaust hanger). Remember to keep your GASKETS!!!
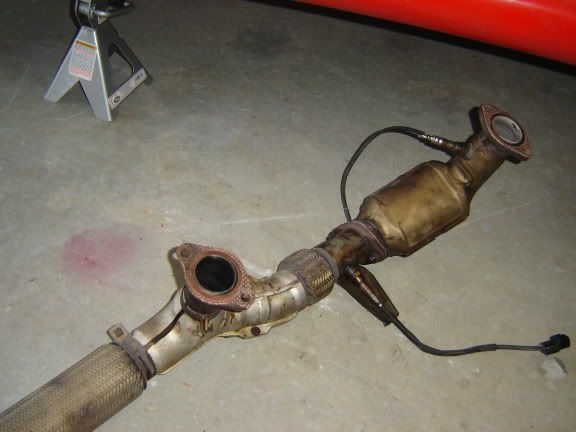
Now you have the DP hanging by the bolt attached to the body, and the front precat bolts which are loose by now (hopefully). I take the front precat bolts off now, letting the front of the DP rest on the ground.. Now take out the 12mm bolt thats attached to the DP, the last thing holding it on. Loosen and let it rest on the ground. HOPEFULLY, this is what you see in the pic to the left. The front precat is the first attachment followed by the DP. Now take time to take the front precat off, its just the 2 19mm bolts there.. set everything else aside.. its time to GUT AWAY!!
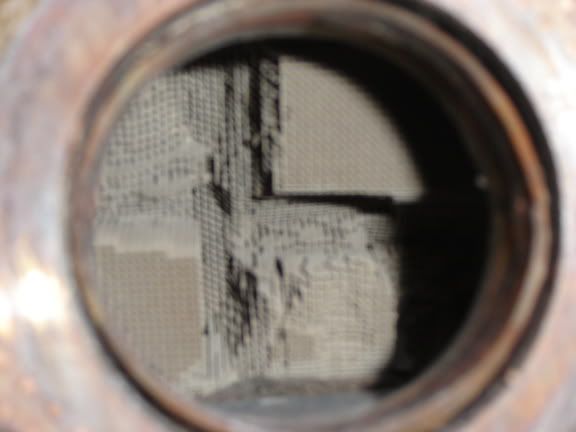
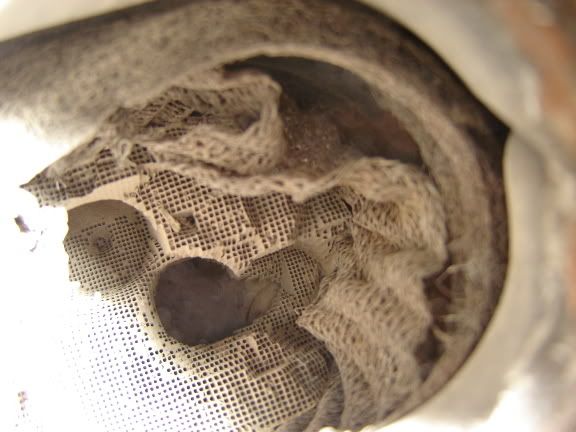
Now we are gutting. There are MANY MANY methods to gut. Once you see what youre dealing with you may want to change your tactics. The front precat took me literally 10 minutes MAYBE.. take that sucker out to your front or back lawn, secure it either with your legs or on a table in a vise.. and go to it. I used the chisel at first. EXTREMLY EFFECTIVE... chisel around the edges first, then make a "X" through the middle.. take time to tip it over and dump into a box.. I showed both the chisel marks and the drill.. One thing to remember.. there is a wire mesh AROUND the honeycomb and a mesh circle both before the honeycomb and after.. getting this stuck in a drill is not cool... so chisel, dump, chisel, dump.... once you get down pretty far grab that mesh with needlenose pliers and yank it out.. if it wont come.. chisel around it.. Its not hard.. youll get it easy enough.. do what ever you think works. Results are next..
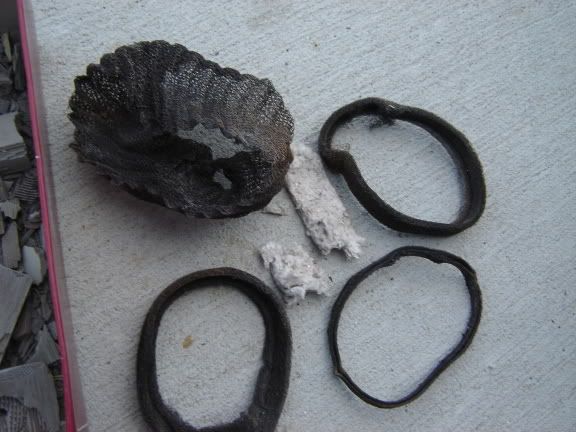
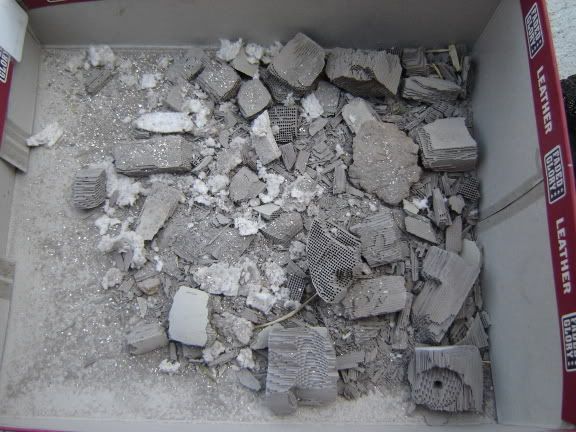
This is all the crap that will come out of the precat.. Notice the 2 rings, the big wire mesh "sponge" and the debris. If you chip at it with the chisel it will be in chunks, no mess, no fuss. Nice and easy, definetly the easiest way to do it.. and cleanest..If you dont think they are that restrictive test it.. Blow through the precat before you gut it, and after.. HUGE difference.. Besides.. look at all that crap you just took out!!! Multiply it by two.. and yeah, its alot of restriction...
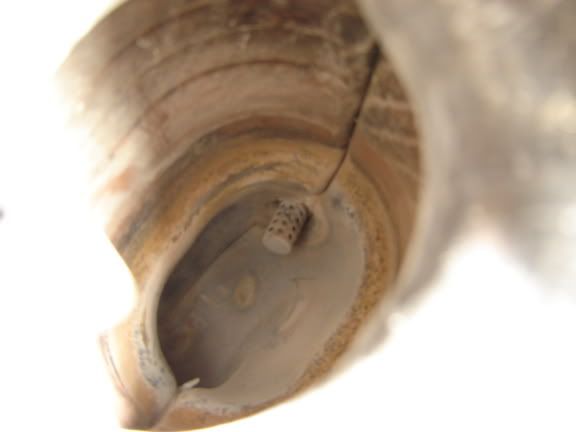
And when were done its clean as a whistle!!! See the O2 sensor at the bottom?? DONT CHISEL OR DRILL IT. Its important so be careful when chiseling.. its at the bottom before the bend so you should be good to go.. dont get crazy with it.. when its clean, its done, blow it out and make sure everythings gone... Now we get to do the rear precat... and Oh the Horror!!!!
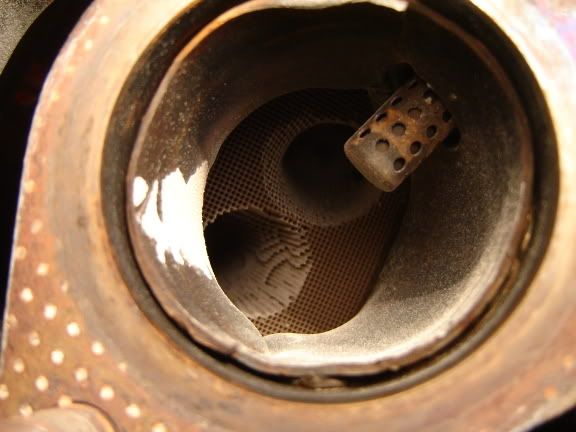
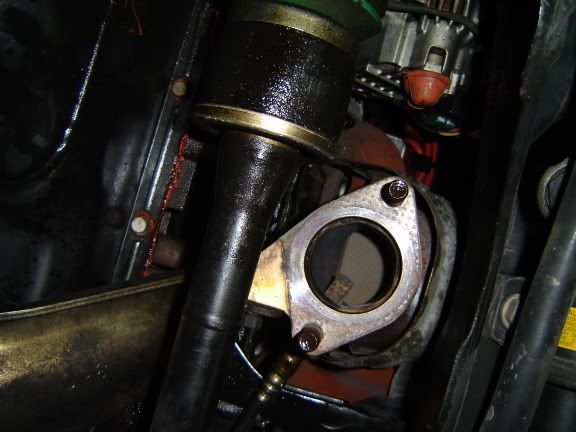
Now get under the car.. SUIT UP!!! Here is a pic under the car of the rear precat..both untouched and after 2 drills with the 1 inch boring bit...You are going to hate this stuff... after the first one, you feel confident, you think youre almost done, you think its a piece of cake.. NOPE!!! The second precat has the O2 sensor on the FRONT not the back, so you have to work around it and make sure not to damage it. That and youre trapped under your car, that and everything you clean out of it is going to fall right back on your face.. So.. Suit up and get ready to get dirty.. Wanna see why its such a messy job????
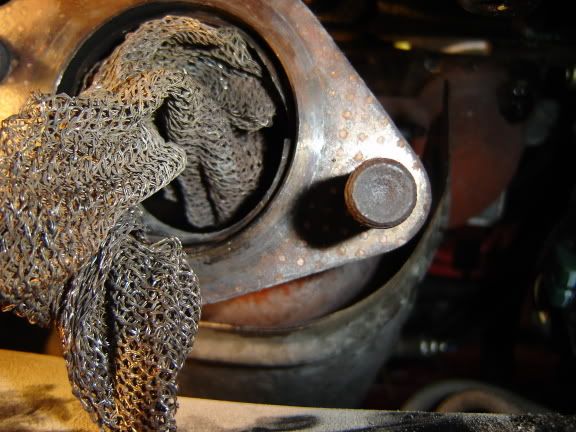
It will fight back.. lol. It will spit, spew, blow crap all over you.. so get ready.. some use a fan to blow the stuff away from them as they drill.. Chiseling is tough unless you get a long chisel and even then its not nearly as hard as the first precat.. Drilling away works, but its messy and takes a while.. You will get stuff in you eye, just accept it. lol. You will get dirty and you will hate it.. but the end is coming soon!!!
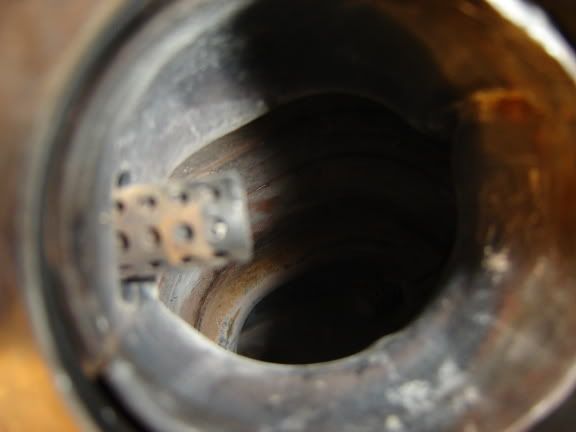
AND ITS CLEAN!!! OMG!!! ITS POSSIBLE!!! Now we go to reassemble everything...
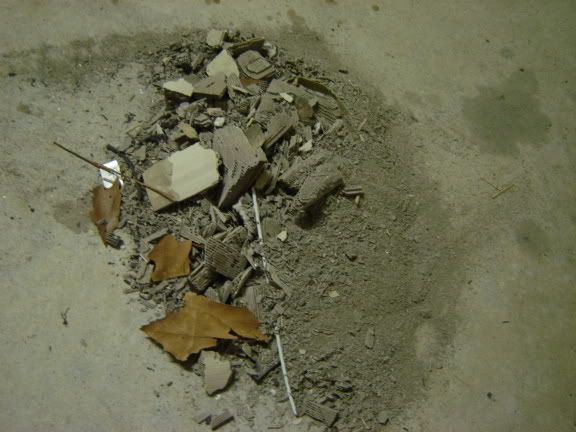
LOOK AT ALL THAT DEBRIS!!! A big difference between what comes outta the front precat and the rear one eh?? No chunks here.. just DUST, and LOTS OF IT.. Ok, Simple.. Now were done. Just for fun you can fire up the car without the DP in the way.. IT sounds mean.. and yes, you might get flames outta the bottom so dont be retarded with it.. Have your fun and get back to putting it together so you can enjoy it... First ensure the Front precat is attached to the DP assembly. Put Antiseize on all the bolts if you like, it makes it easier if you have to do it all again for some reason.. So attach the front precat.. and clean a bit under the car.. now we go to assembly again....
Just go in reverse...
- Attach the back part of the DP to the exhaust hanger by the testpipe/cat. its a simple bolt and will keep it suspended like you need...
- Once that is done we will replace our gasket (Still have it right??) and attach the front of the DP (front precat) to the front header from underneath.. You gotta have small hands or some patience.. Dont forget your gasket and just lightly screw on the bolts. MAKE SURE EVERYTHING MATCHES UP ON THE REAR PRECAT.. the testpipe will move around so you should be ok.. DONT TIGHTEN THE SCREWS.. just keep the DP from falling on you.
- OK.. now we can bolt up the rear precat to the DP, again, put em on there and screw on a bit, but dont tighten up yet..
- After that we move to the test pipe. On all connections DONT FORGET YOUR GASKETS!!! so once all three connections are bolted up we go back and tighten them all on.. Use that antiseize if wanted, but make sure they are tight..
Now dont forget about your O2 sensors.. Double check all your gaskets and connections to make sure they are tight. Replace the heat shield if you took it off. Reattach both O2 sensors, and smile!!! YOURE DONE!! This is probably one of the messiest jobs you can do, it sucks, its time consuming. But if you have all the right tools it really is not very hard and its FREE (Minus trips to the cancer center for lung cancer hehe. I hope this helps everyone out.. You will notice a more breathy and airy sound when you hit the gas.. You dont have a loose connection, its just the air whooshing through your now wide open precats.. That with a test pipe is a TAD BIT smelly at startup.. but not to bad once youre warm.. Ok.. im done.. SLURPY TIME!!!!
HOPE YOU ENJOYED IT... COURTESY OF JSTODDA79... PM ME IF YOU HAVE ANY QUESTIONS... THANKS!!
--Jstodda79 19:36, 4 April 2006 (EDT)
On the first gen Turbo models there is no wire mesh in the pre-cats. As well I found that a 12" x 1/4" masonry bit followed up by a 12" x 1" masonry bit really cleaned out the precats with ease. The masonry bit tip will not easily penetrate steel as it is not porous enough for it to bite. Also the rear pre-cat is the only one on 1st gens with an 02 sensor and it is about 3 to 4 inches up from the cat material. So when you drill it out and you feel that you broke through you know to pull back and still have a good amount of play just in case.