Suspension: Repair Lower Strut Bushing
A common problem when removing the struts from the subframe is the sleeve sticks on the post. In CntrlSwitch's video http://www.youtube.com/watch?v=uWh-2BinAOs he had that problem when deleting the rear wheel steering. Also, you will notice when people are selling OEM struts usually a bushing will be missing from one of the Struts.
I was working on the a 92 Stealth TT, so all dimensions may or may not work with other models and generations.
Best option when dropping the rear subframe is to disconnect the struts at the top of the strut tower and avoid the problem.
These bushings are not offered by the dealer, and I could not find one the right size offered in the aftermarket. I did find a part that could be modified to work, although it was not made for this purpose.
Brand:Energy Suspension Manufacturer's Part Number:9-8145G Part Type:Shock Bushings Product Line:Energy Suspension Shock Bushings Summit Racing Part Number:ENS-9-8145G
UPC:703639416135 Shock Bushing Type:Bayonet tower end Bushing Material:Polyurethane Bushing Color:Black Shock Bushing Outside Diameter (in):1.875 in. Shock Bushing Inside Diameter (in):0.563 in. Bushing Length (in):0.813 in.
Neither the inner diameter or the outer diameter is the correct size.
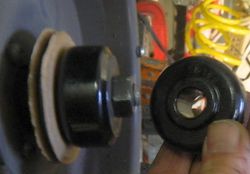
I put the bushing on my grinder and then used a file to reduce the outer diameter to 1.71 inches so the bushing could be pressed into the strut eye.

I pressed the bushing into the strut eye using an old break pad and a large Clamp, much like you would press in a break caliper cylinder.
http://www.3swiki.org/File:Press_bushing.jpg
I took a 0.931 inch hole saw and cut out the inner diameter of the bushing. Hardest part here was centering the hole saw on the bushing since there was already a 0.563 i.d on the bushing. In retrospect, I should have wrapped some tape or something around the center drill of the hole saw to center it up better. This hole was pretty small compared to the outer diameter of the sleeve, so I opened up the edge with a step drill. The step drill cut in about 1/8 of and inch.
The old sleeve could then be inserted into the 1/8 groove and then pressed in again. I pressed the sleeve in so that about equal parts stuck out from each side of the strut eye. Used a large socket to allow the sleeve to be pressed past the outer edge It seems pretty firm, but I have not road tested it as my car is not currently running.
